

If you want to know whether Google is indexing your pages, you need Google Search Console set up.
It is one of the most reliable tools for checking what Google can see, whether pages are indexed and what might be stopping them from appearing in search results.
Many people only look at this after rankings drop. That is the hard way to do it.
Setting it up early means you can spot issues sooner and make changes with confidence rather than guessing.
This guide walks you through the simplest setup method from start to finish, using the URL prefix option and HTML file verification.
What Google Search Console Helps You Do
Once Google has crawled a page, it still has to decide whether to index it. If a page is not indexed, it cannot appear in Google search results at all.
Search Console helps you check if a page is indexed and it gives you a clear place to inspect a specific URL and see Google’s indexing status for that page.
Step 1: Go To The Search Console Setup Page
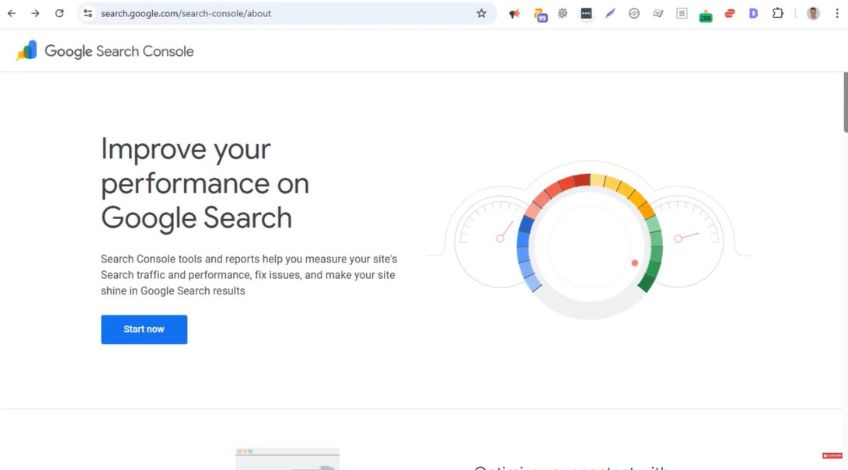
Open your browser and go to:
search.google.com/search-console/about
On that page, click the Start now button. This takes you into Search Console.
Step 2: Add Your Website As A Property
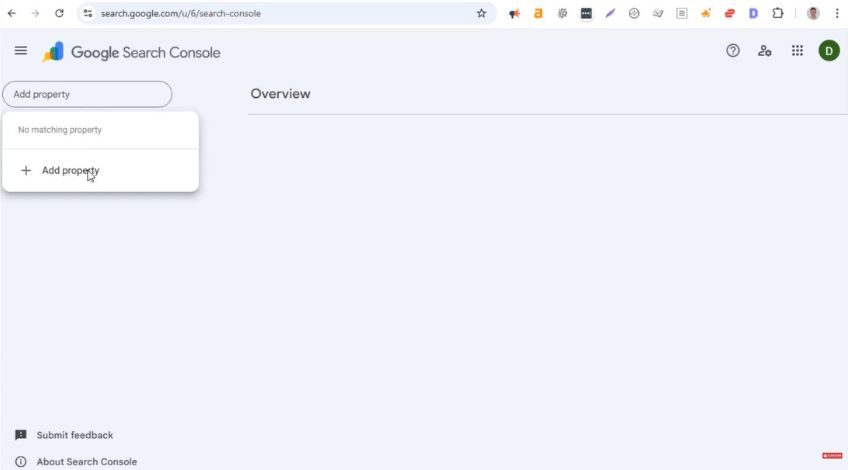
If you have not added any websites before, you will see an empty view.
Click Add property, then click Add property again when prompted.
You will see a couple of methods but the easiest one to follow is URL prefix.
Step 3: Choose URL Prefix And Paste In Your Homepage URL
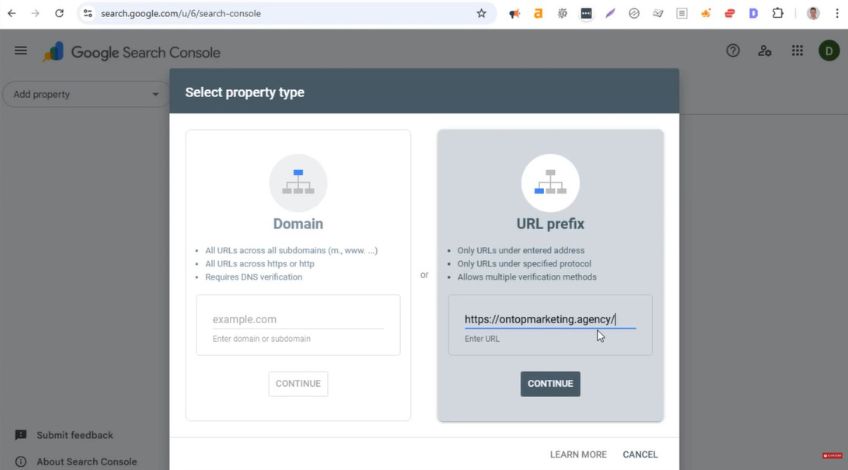
Go to your website homepage in another tab and copy the full homepage URL.
Paste it into the URL prefix box but make sure the URL includes https at the beginning, exactly as your site uses it.
Then click Continue.
Search Console will now show you different ways to verify that you own the website.
Step 4: Verify Ownership Using The HTML File Method
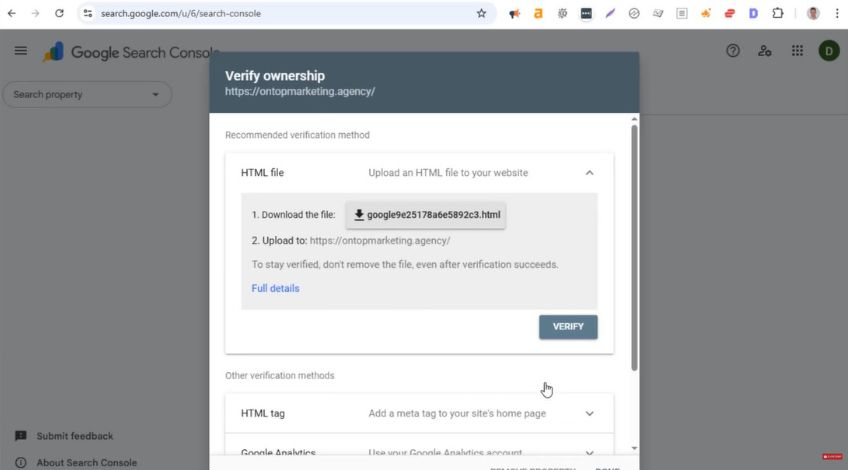
There are a few verification options and the simplest one is the HTML file method.
Download the HTML verification file to your computer. Once downloaded, you need to upload that file to the root directory of your website.
This is the same top level folder where key site files sit.
If you do not have access to your website files, pass the file to your developer. If you do have access, you can upload it using an FTP client.
Step 5: Upload The File To Your Website Root Directory
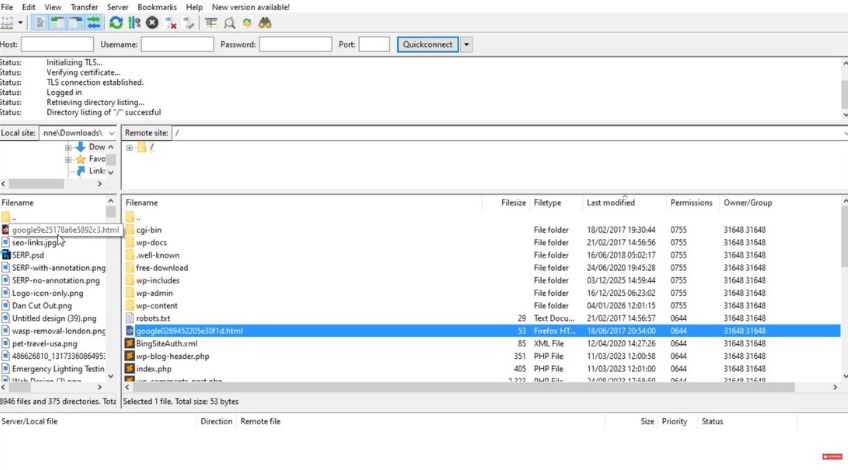
If you use an FTP client such as FileZilla, log in and open the root directory of your website.
Then drag and drop the downloaded HTML file into that root directory and let it upload.
Once the file is in place, go back to Search Console.
Step 6: Click Verify In Search Console
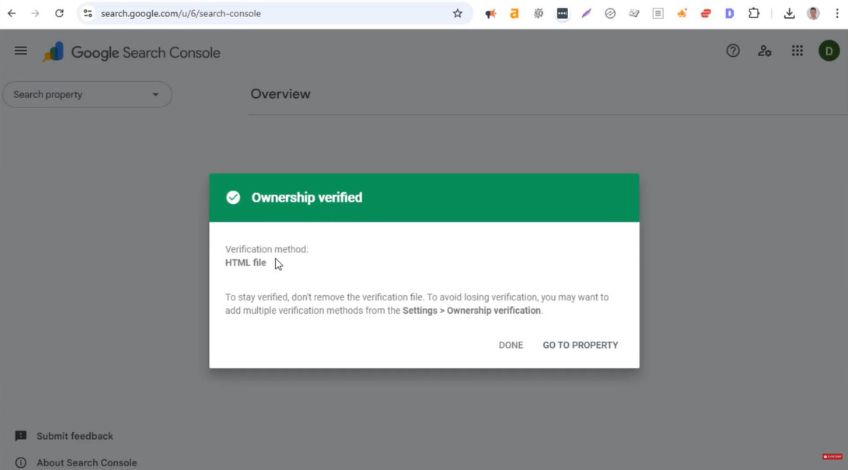
Back in Search Console, click the Verify button.
If the file is in the correct place, you will see a message confirming ownership. It should say ownership verified and it will mention the verification method as HTML.
Click Go to property to enter the Search Console dashboard for your website.
Step 7: Do Not Panic If You See No Data Yet
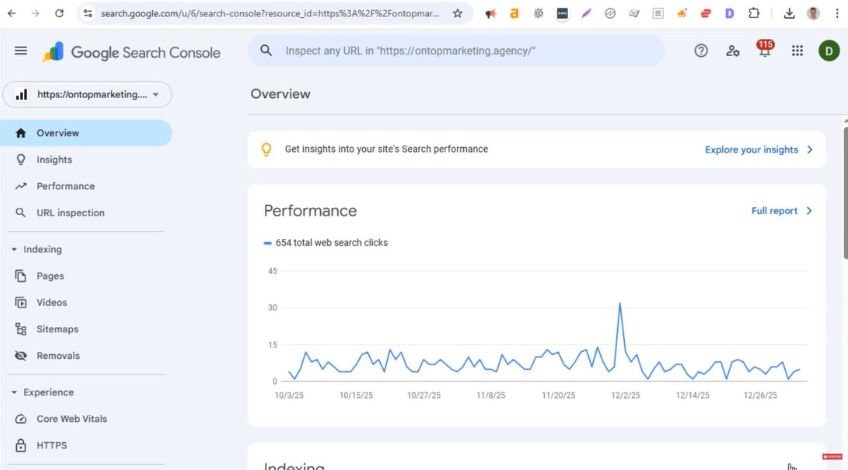
You may see lots of data straight away if the site has already been set up in Search Console under a different Google account.
If you see no data and a message telling you to check back in a couple of days, that is normal.
It may take some time for Search Console to show information.
Step 8: Use URL Inspection To Check If A Page Is Indexed
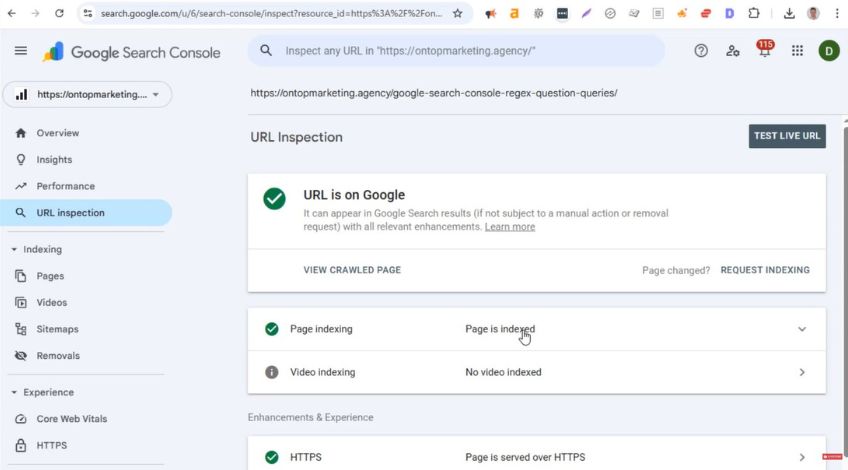
Once your site is added, the quickest way to check indexing for a specific page is the URL inspection tool.
Go to the page you want to check and copy the full URL.
In Search Console, find the bar at the top that says something like “Inspect any URL in your website address”. Paste the URL into that bar and press enter.
After a short wait, Search Console will show a report. In the page indexing section, it will tell you clearly whether the page is indexed.
A Faster Alternative Check You Can Do In Google
If you want a fast check in Google itself, you can use the site search operator.
On Google, type:
site: then paste the page URL
If the page appears in results, it is indexed. If it does not, it is likely not indexed.
This method is quick but it will not tell you what needs fixing if the page is not indexed. That is where Search Console is more useful.
How To Use Search Console From Here
Once Search Console is in place, you can start checking pages that should be indexed but are not.
If you notice indexing problems, common causes can include technical settings being wrong, such as issues with the robots.txt file or a noindex meta tag being left on pages by accident.
These are the kinds of problems that are much easier to spot and troubleshoot once Search Console is ready to use.
With this set up, you now have a reliable way to confirm whether Google is indexing your pages. A tool that makes it easier to diagnose problems when visibility drops.