
Optimizing your page takes more than having quality content, including the right keywords, and using appropriate heading tags.
Sure, we all know that those are extremely important. However, it is possible that you are not taking your SEO efforts to its full potential if you are not yet using HowTo Schema on your blog posts.
To improve your Search Engine Optimization process, I’m going to show you:
- How to write HowTo Schema
- How to add it to your WordPress blog posts
- How to test it for errors, and
- How to add it to your SEO process when you have a team of writers and publishers for your websites
In this article, I’m going to explain what HowToSchema is, its advantages, and how you can use it to make your SERP listing bigger, increase your click-through rate, and help search engines understand the context of your web page.
What is HowTo Schema?
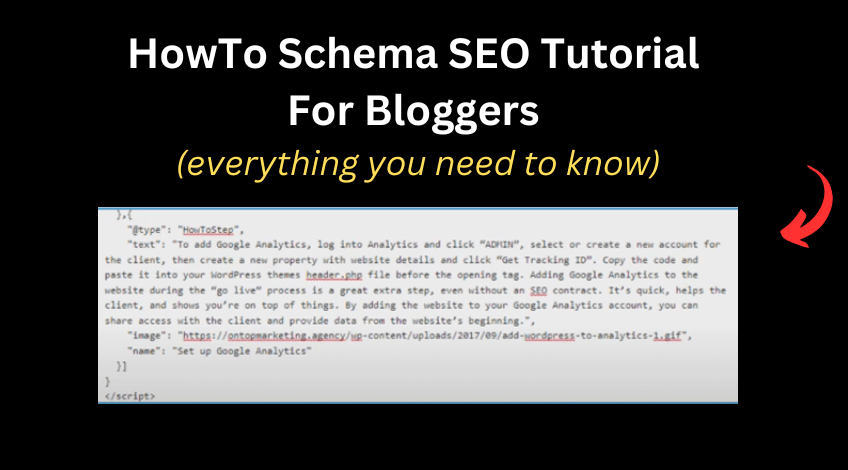
Also known as HowTo Schema Markup or Schema Markup, it is basically a bunch of code that you include on your webpages. Its main purpose is to make use of structured data to provide search engines with more information about your websites.
Let’s say, you added HowTo Schema on your blog talking about “How To Make T Shirts Softer”, as an example. In doing so, search engines like Google, Bing, and Yahoo! will have more context about what your article is about.
As a result, there is a better chance of your blog ranking higher on the SERPs as the search engines can assess if your content is helpful to readers.
What’s The Benefit Of HowTo Schema?
I am not telling you to add HowTo Schema to your pages for no good reason.
As someone who also uses it on my websites, these are the advantages of using Schema Markup I personally experience:
Improving rankings
As mentioned earlier, the whole point of Schema Markup is to give search engines a better idea of what your page is about. It displays more context on the contents of your articles in a format that they can easily understand.
When Google, Bing, or Yahoo! crawlers browse your pages and see the schema markup, it is possible for your sites to get indexed better and faster, which will be great for SEO.
Many single variable tests performed by SEO experts have shown HowTo Schema to be a positive ranking signal. This would mean that it is a good factor that will help improve your pages’ position in the search engines.
Whether you believe the results of the tests or not, the potential improvement structured data can add to your page is certainly something you shouldn’t ignore.
Bigger SERP listings
Ranking high on the Search Engine Results Pages (SERP) is one of our main goals in SEO.
Because you want to have better rankings, optimizing your listing is essential so that you’ll have a better chance of having more users visit your page. This is where adding a HowTo Schema can help you.
Did you know that it is possible to have a bigger SERP listing if your content is structured properly while using schema markup?
Let’s take a look at a search phrase where it makes total sense for Google to bring HowTo Schema into the SERP.
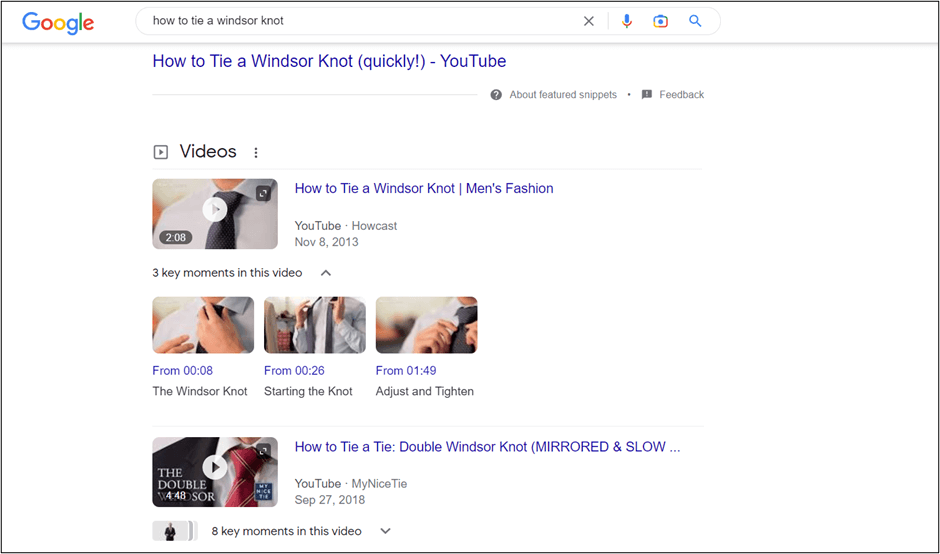
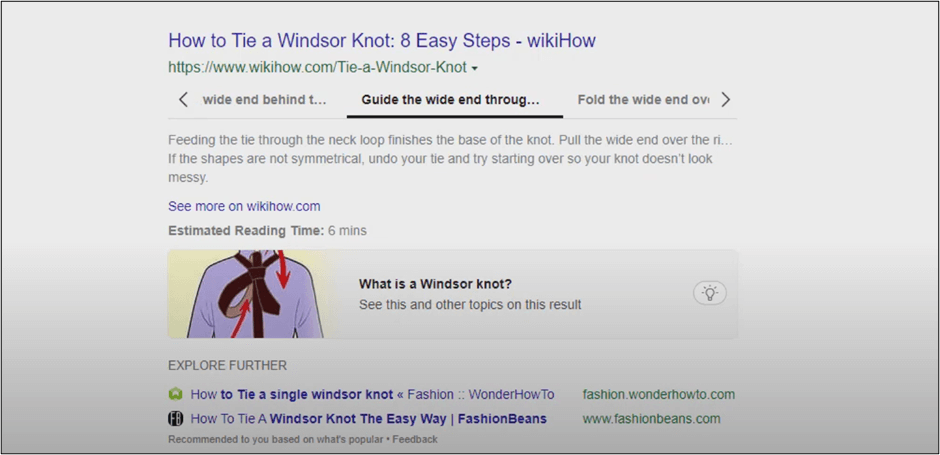
In this example, the search phrase is “How to tie a Windsor knot”.

Since it is a phrase that’s asking about how to do something, it is normal for the SERP to be dominated by videos, like these:
Once we scroll down, we’ll begin to see more articles in the SERP.
Let’s take a look at these two SERP listings:
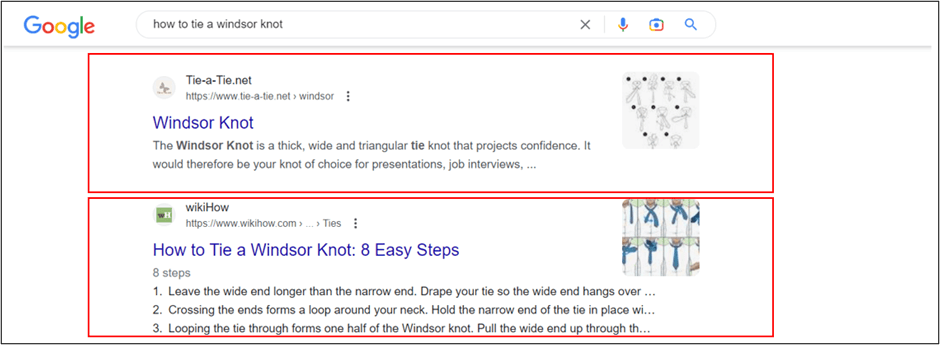
Do you notice how there’s a difference in size between the two?
The listing from wikiHow is quite a lot bigger than the one above it AND shows more information. Also, although the preview says that there are 8 steps on how to tie the knot, the SERP listing is already displaying three of them.
If you are the one looking for a tutorial on how to tie a Windsor knot, you’ll know that the wikiHow article will teach you how, step-by-step, just by the SERP listing.
Hence, there is no doubt that the second listing more effectively displays valuable information to the searcher. With the preview, they’ll know that the article will be able to answer the things they want answers to, in a clearer manner. This is possible with the help of HowTo Schema.
HowTo Schema Tutorial
Now that you know what HowTo Schema is and how it can be advantageous for your websites, let’s learn how to use it for free, in the easiest way possible.
To teach you how to do this, I’ll need an article that has a heading, a description of what needs to be done, and step-by-step instructions on what to do.
Today, I’ll use an article I wrote back in 2017, How To “Go Live” With Clients WordPress Site In 30 Minutes [Free Checklist], and turn it into a HowTo Schema.
Using the free tool to create a HowTo Schema
Since we’ll make use of the easiest way to create the schema markup, there’s a free tool that will help generate the code.
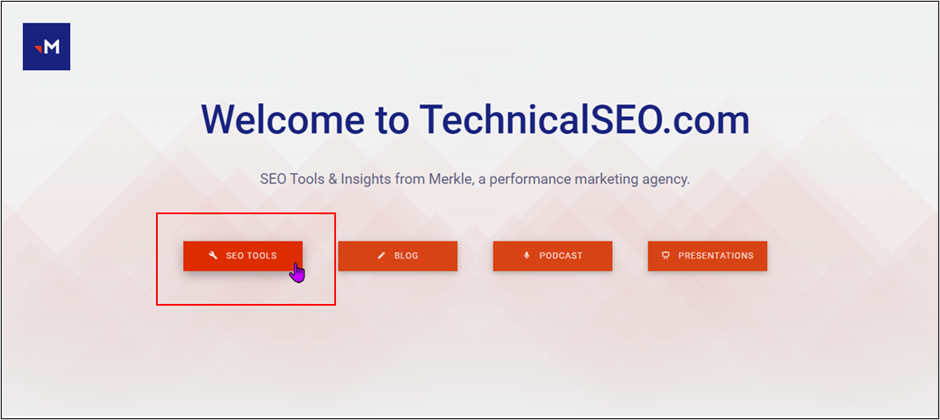
The site I personally use is TechnicalSEO.com[1]
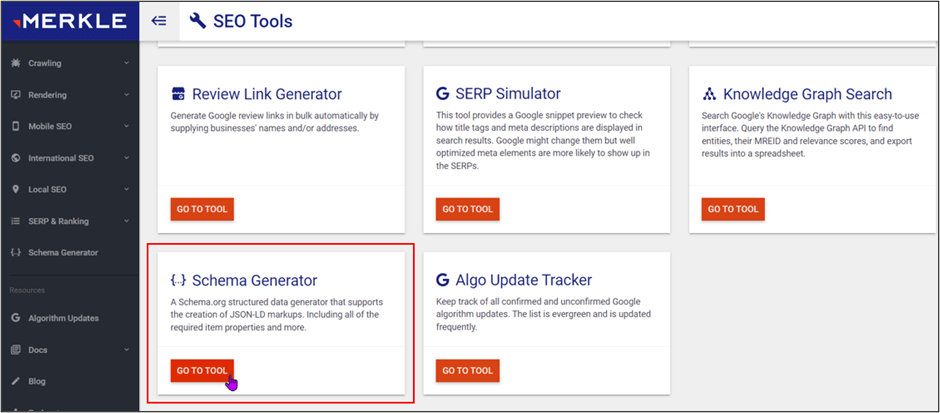
When you’re on the site’s homepage, click on SEO TOOLS.
Next, scroll through the bottom of the page and find Schema Generator. Click on GO TO TOOL.
Then, click on the drop-down arrow and choose How-to.
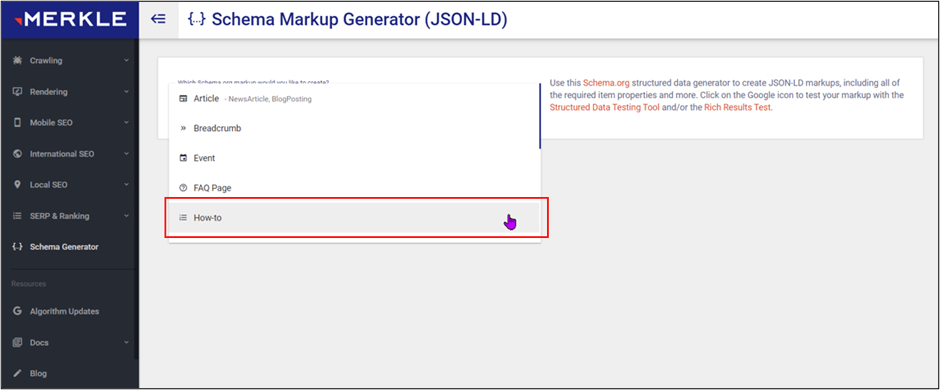
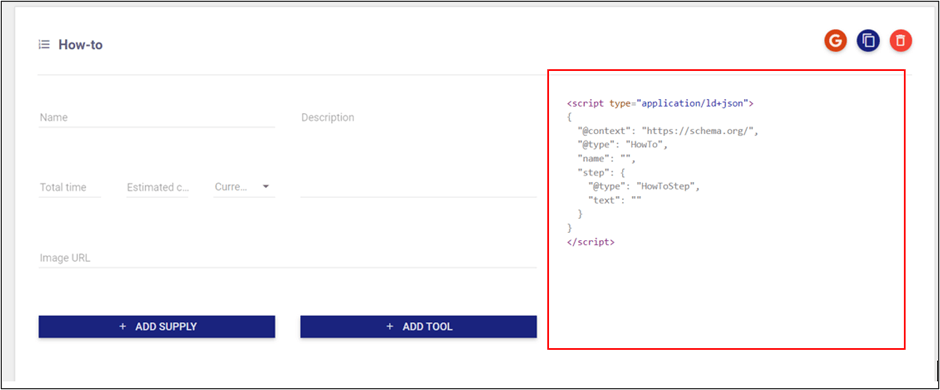
This will take you to the editor you can use to create the schema markup:
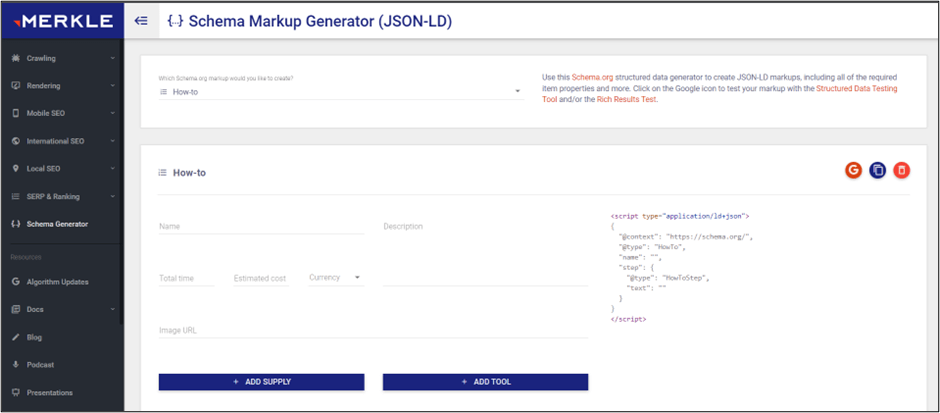
Now, you can start creating your markups by adding each data on the website.
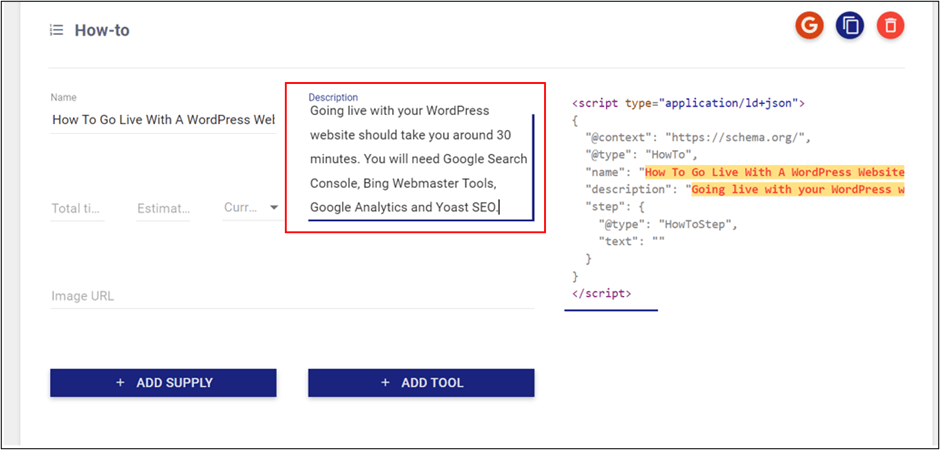
The first thing you’ll see on the Schema Markup Generator is the spaces or fields where you’ll put the details from your article.
This includes the name of your article, description, and more:
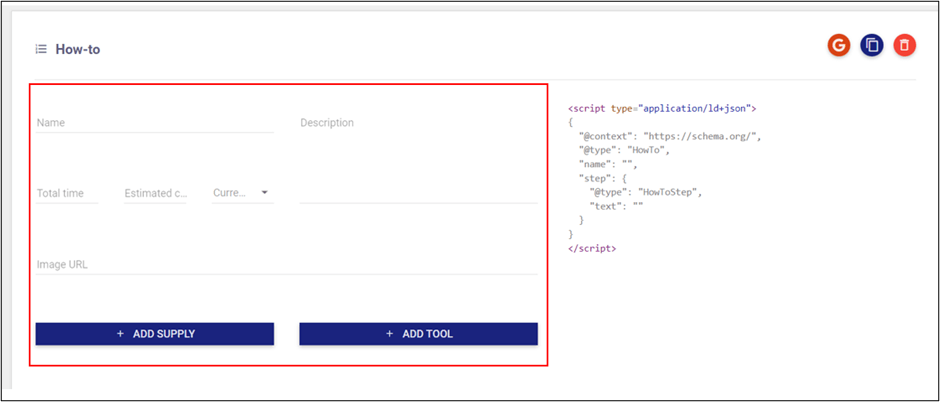
On the right side, this is where you’ll see the code being generated:
TIP: Before using this tool, it’s important to note that you are getting all your data from the article or blog post you already have. Hence, if you don’t have the content ready or it is not yet structured well, it’s best to fix it first as generating a HowTo Schema without having high-quality content may be a waste of your time.
If you don’t know how to optimize your piece of content for HowTo Schema, I’ll teach you this later in the article.
How to Generate HowTo Schema
Using the tool and article mentioned earlier, let’s start generating the HowTo Schema.
This is the time to add the information from your blog post to TechnicalSEO.com.
NOTE: Not all fields in the generator have to be filled out. For example, if you don’t have an estimated cost or total time frame for your How-To article, you can always leave them blank.
1. Copy and paste the following data to the generator.
- Name
The name or title of the relevant How-To section.
Copy the name from your blog post then paste it on the generator.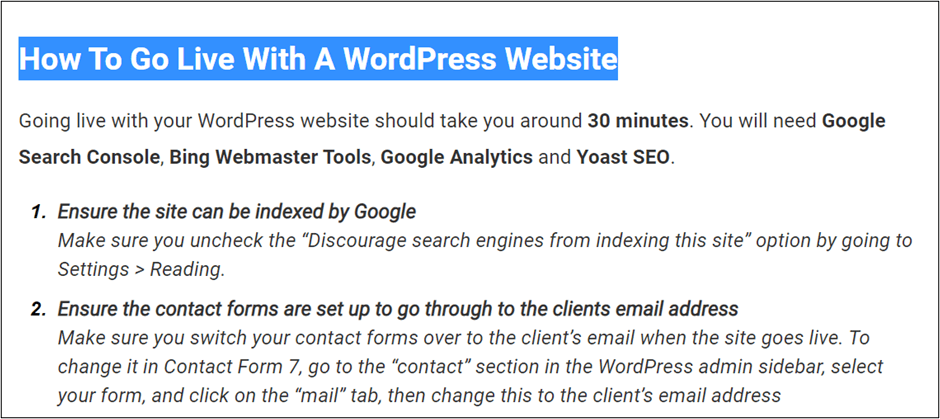
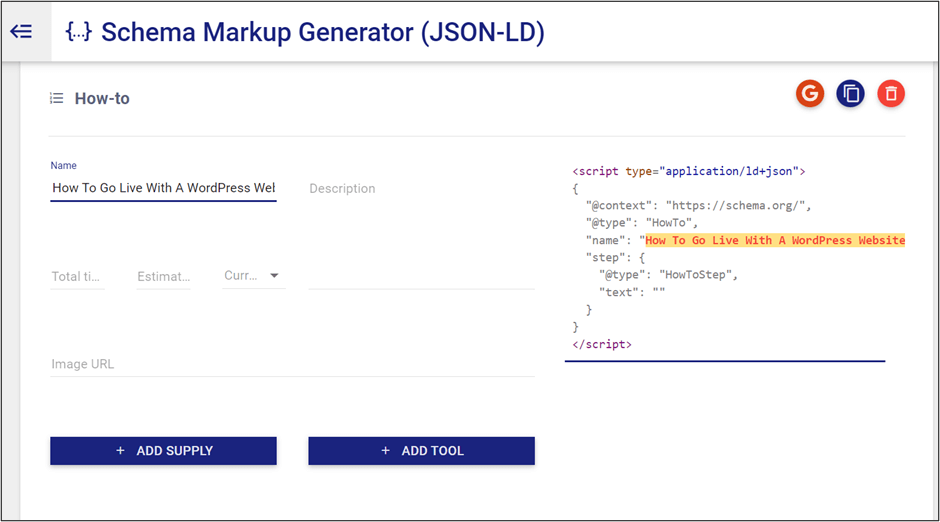
In the article, I was talking about “How To Go Live With A WordPress Website”.
While you’re putting all the details on the generator, you’ll also notice the code is being updated as you go. Check out the right side of the tool! - Description
Provide a little snippet of what the article is about. This is where you’ll write about what you’re doing.
Copy the snippet from your blog post and paste it into the generator.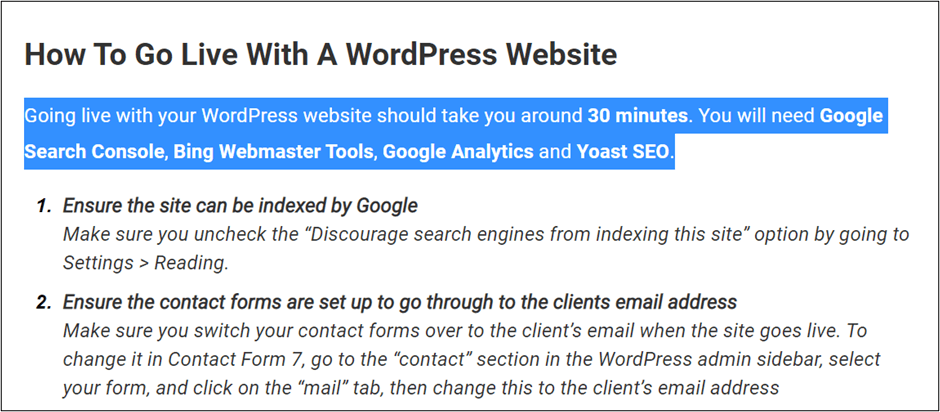
See how the code is updated again? How cool (and easy) is that? - Total time
The estimated time it’ll take to complete the project, if any.
Copy the duration from your blog post and paste it into the generator.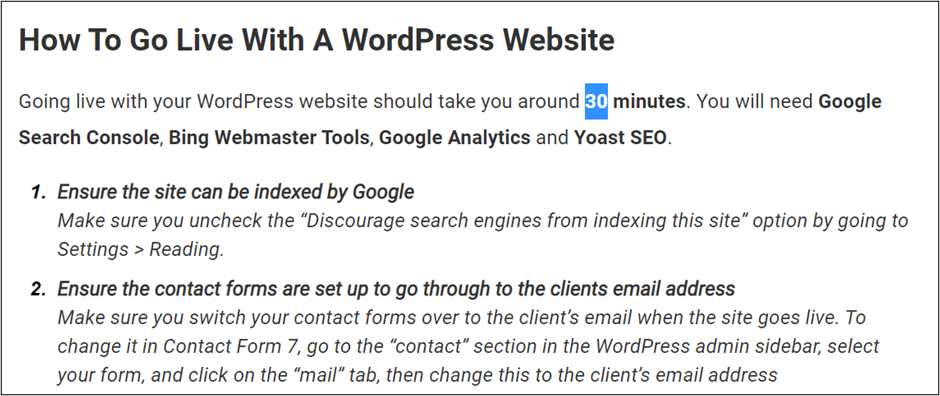
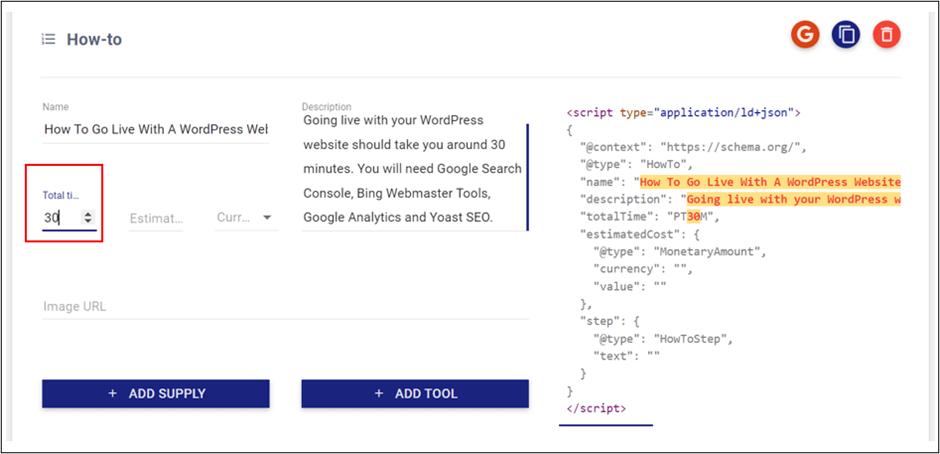
In my article, I mentioned that it’ll only take the reader around 30 minutes to “Go Live” with the Clients’ WordPress site.
If you don’t have total time on your blog post, feel free to leave this blank. - Estimated Cost
How much the estimated cost of the project is.
Copy the estimated cost from your blog post and paste it on the generator.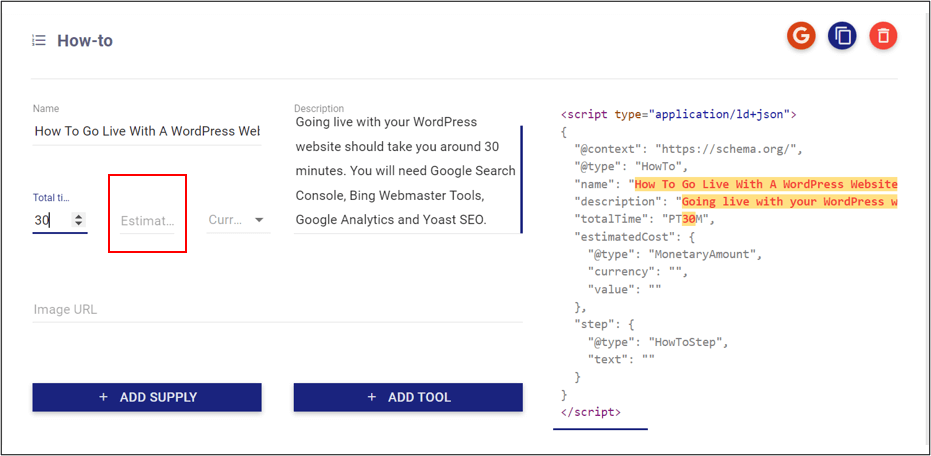
In the article, there are no costs for the tutorial. Hence, I’ll just leave this section blank. - Currency
The currency you’re using.
Choose the appropriate currency from the drop-down arrow.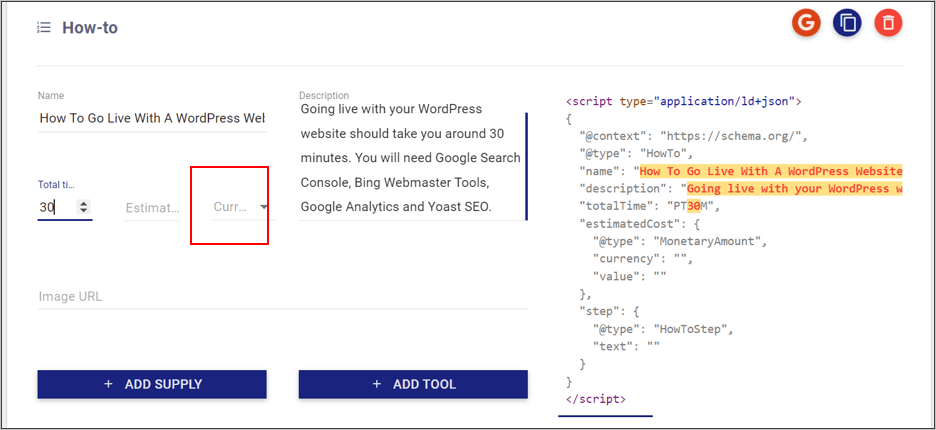
In the article, there are no costs for the tutorial, so I’m not using a currency as well. Hence, I’ll just leave this section as it is. - Image URL
The link to the image you used in your article. Preferably one that shows a good summary or desired result of the How-To.
Choose the image address from your blog post and paste it on the generator.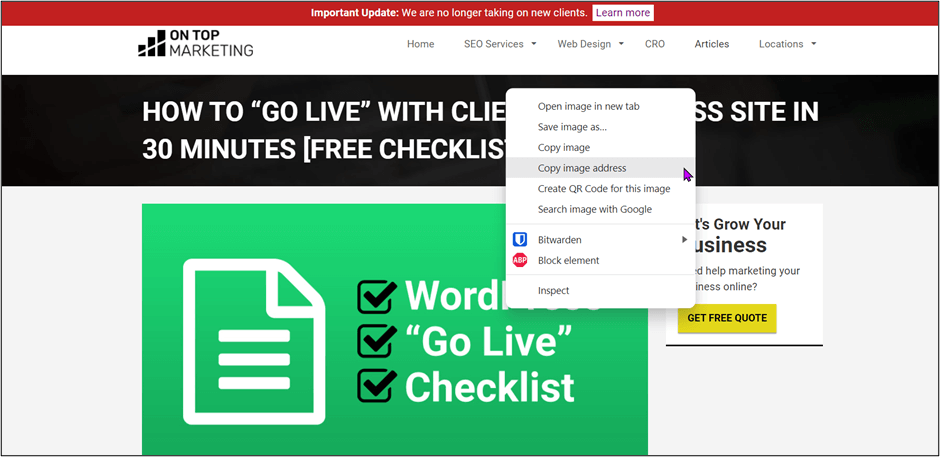
For this, I’ll choose the featured image in my article. If you don’t have an image, feel free to leave it blank.
If you already have an image on your blog, right-click on it and “copy image address”. Doing this copies the link you can paste on the tool.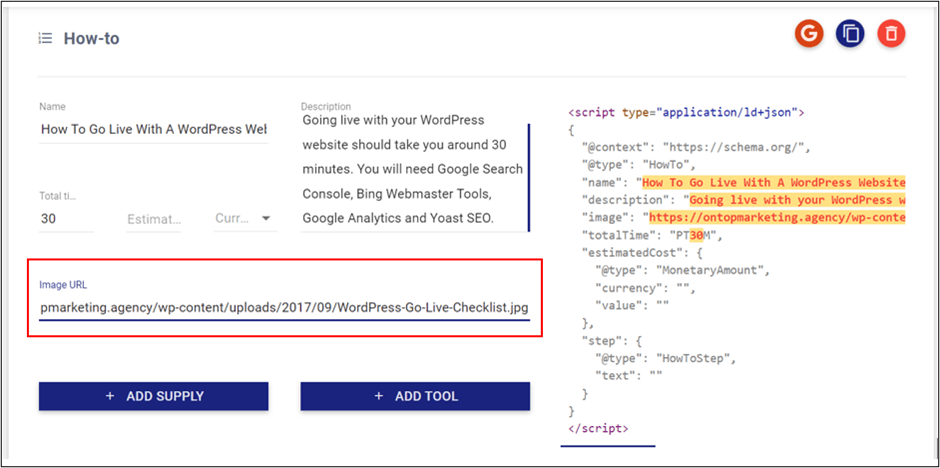
TIP: While you’re copying all the data from your article, you may also include extra spaces from your formatting. Make sure to delete those as it may affect your schema markup and cause errors.
2. Add the Supply and Tools
Supplies refer to the materials you’re consuming in your How-To article.
On the other hand, Tools are the materials or items you’re using that will not be entirely consumed in the process.
Is the difference between the two quite confusing? Just remember this example:
If your article is a tutorial about “How To Make T Shirts Softer”, supply would refer to the fabric softener. The tool you’re going to use would be a washer and dryer.
Click on the Add Tool or Add Supply and copy and paste the data and paste it on the generator. If you’re using more than one, click the “Add Tool/Supply” again to include them.
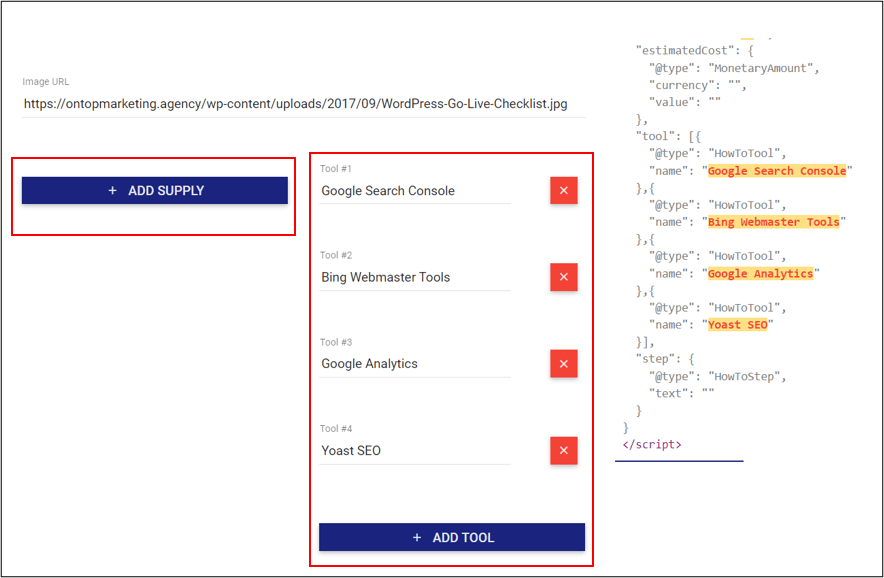
In my How-To tutorial, I am only using tools and not supplies. Hence, I’ll just leave the supply as is and added the necessary tools.
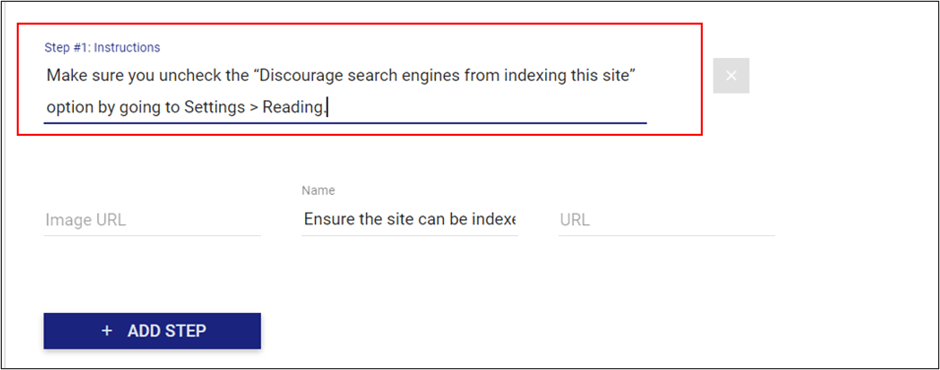
3. Add the Steps
Now that we’re done filling out the basic details on the generator, it’s time to add the procedures.
Scroll down and you’ll see the section to add the steps and other relevant data to your HowTo Schema.
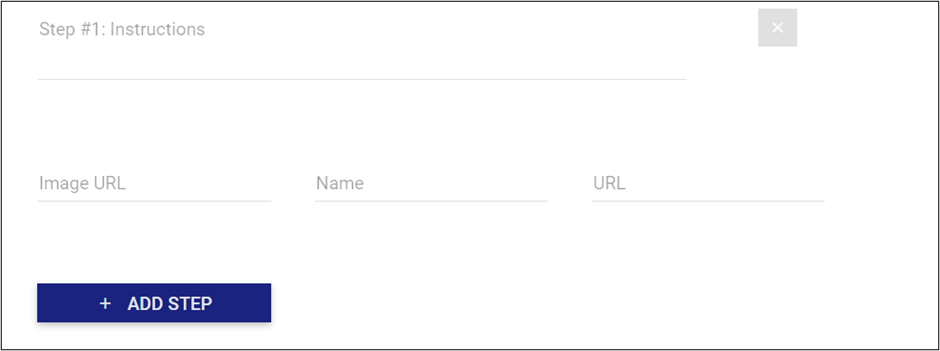
This is where you’ll put the Instructions of the How-To section in your article. Copy the content from your blog post and paste it into the applicable fields on the generator.
I personally think that the positioning of the fields is quite backward for this part.
Why do I say this? Because, when you look at the sections, you’ll notice that the description for the steps is on the top, while the title or header for each instruction is placed between the Image URL and URL fields.
If it’s your first time using this, it’s understandable for you to think that the generator is asking for the title on the first field to fill out.
So that you’ll not be confused, just remember the following:
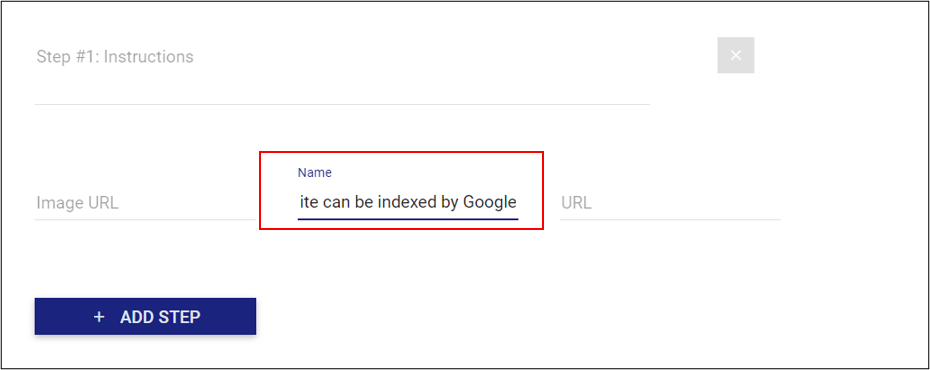
- Name
The “name” being asked in this section here is the title or header of each step.
Ideally, when people skim this part, they should be able to know what to do as it already mentions the process.
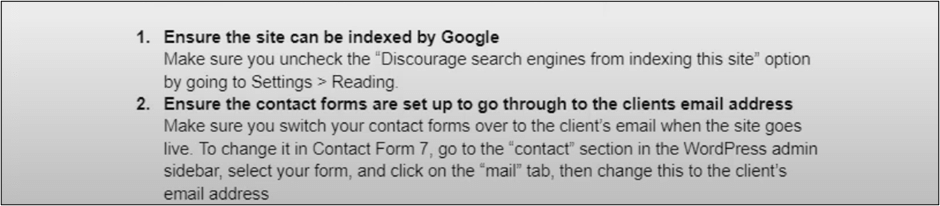
For example, the titles in bold for my article are the names I will put in the tool: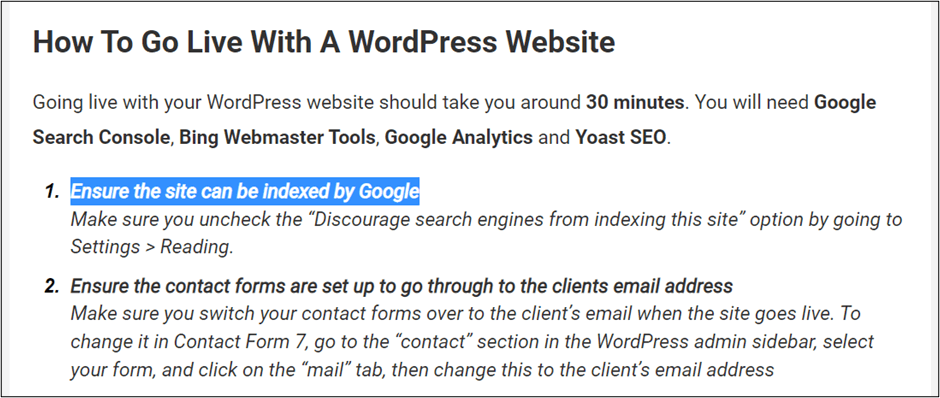
- Instructions
The instructions will contain a description of each step in a more comprehensible way.
If the readers were not able to understand or follow the titles on your guide, then this part should explain the steps further to ensure that the readers will be able to follow each instruction properly.
In a way, this is where the majority of your content will go.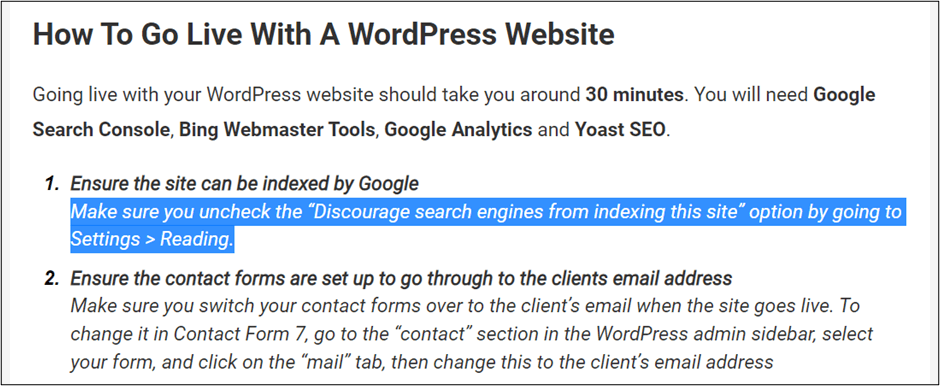
- Image URL
In this field, you can put the link to your image if you have it. As I did earlier, just right-click on your image, click on “Image address”, then paste the URL on the section.
If there are no images in your article that will show each step, feel free to leave this blank.
Since I have the images on my blog post that show each step, I’ll add the link to the generator.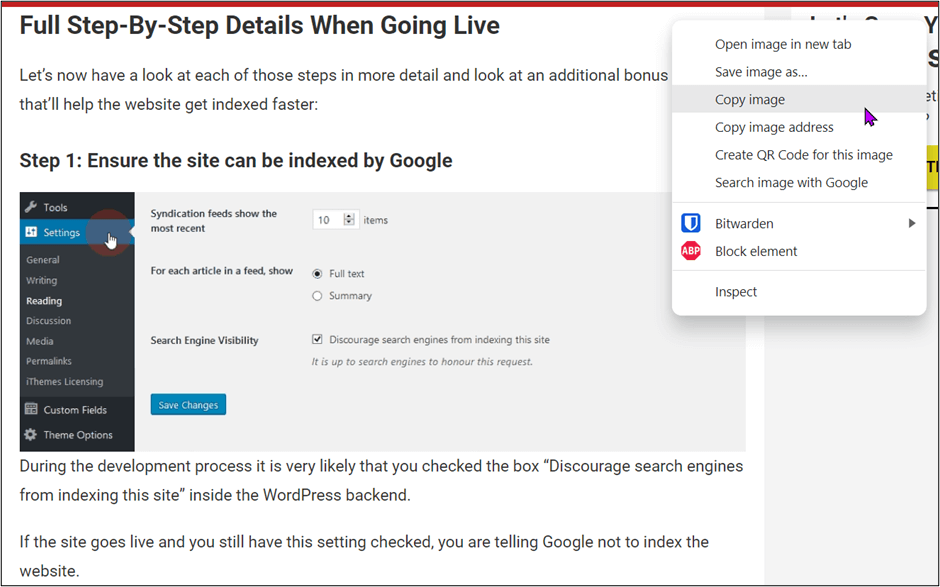
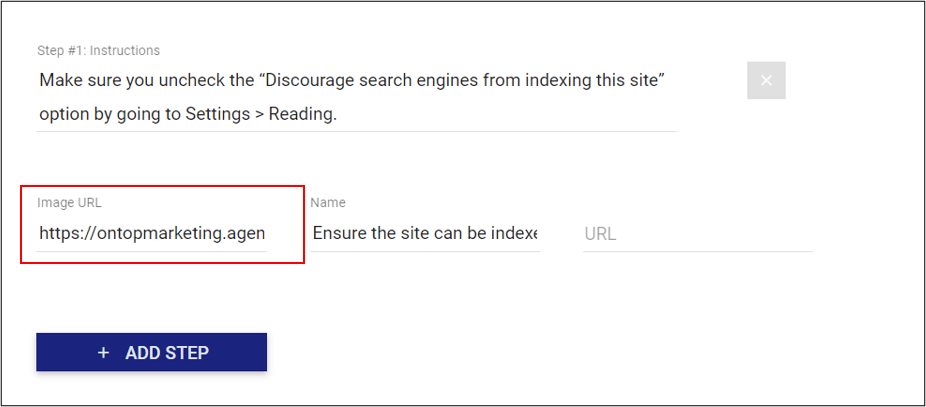
- URL
If there are URLs to your steps, add them to this field. If there are none, just leave it blank.
Personally, I rarely use this section as it is not quite relevant to the content my team publishes. In this example, I’ll also leave it blank.
Now that I finished adding Step 1, I’ll continue with the remaining steps in my article.
To include more steps, click on ADD STEP and do the same process until you’re done.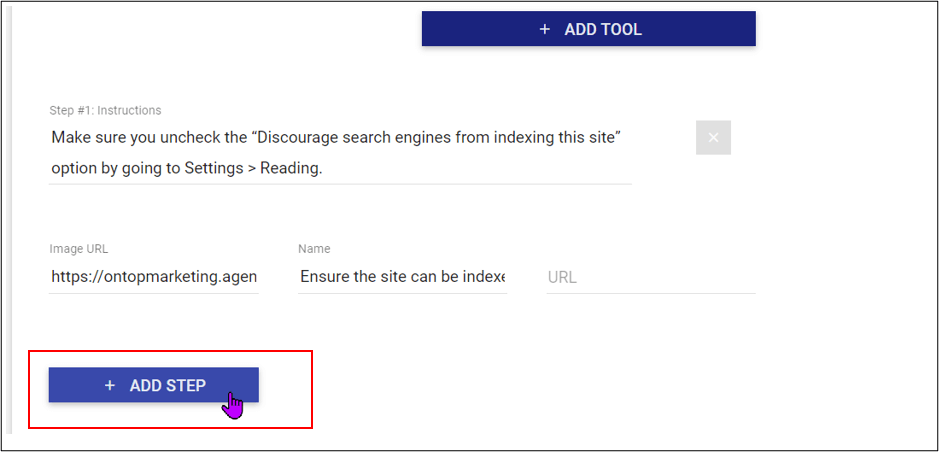
In my article, I had several steps that I need to upload on the generator.
I will keep on adding the step field and putting the information until all the steps are included.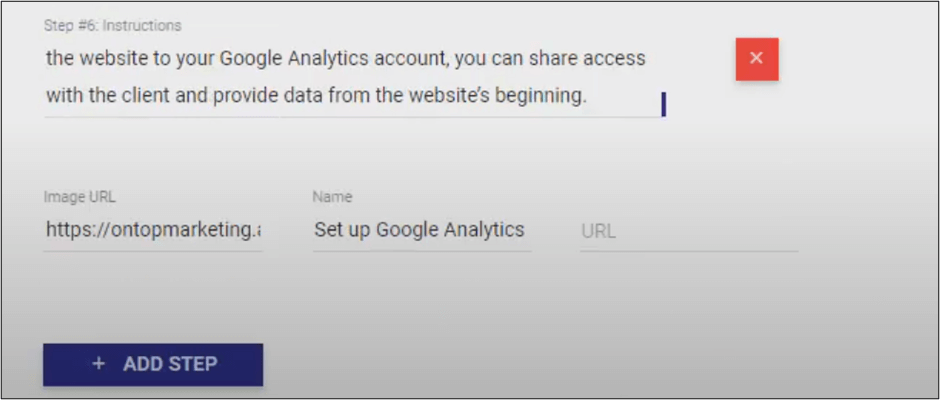
4. Copy the Code
Once all the necessary information is completely pasted on the site, scroll back to the very top.
You now have this JSON code that’s generated in this JavaScript right here:
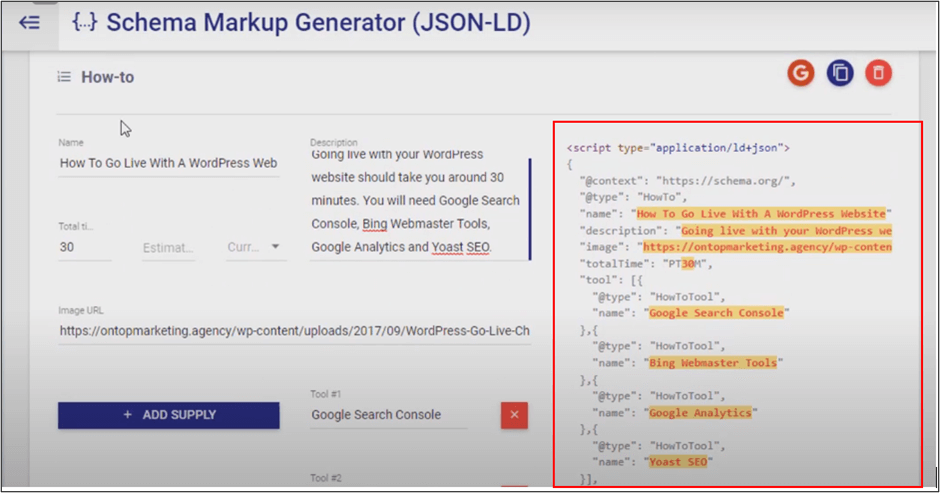
This code has been generated while I was putting in all the data earlier.
Now, I’ll click on the copy button to get all the schema markup.
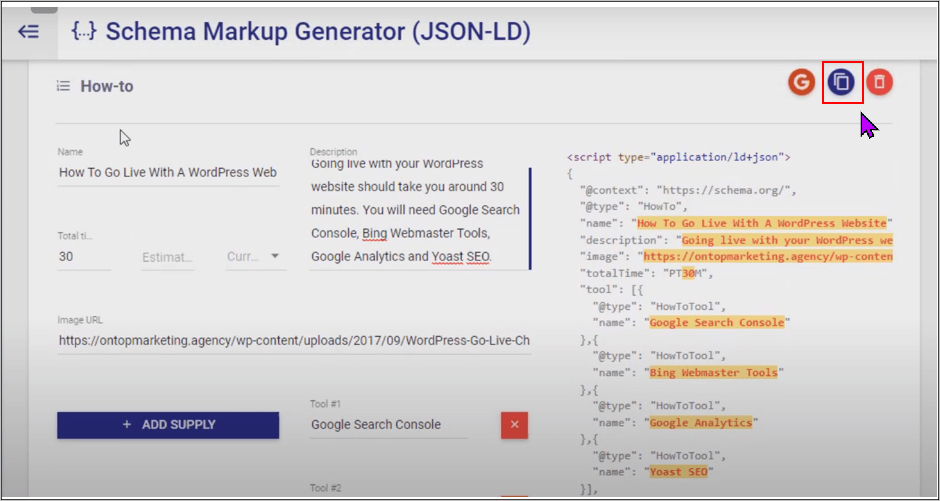
Once the code is copied, I can now proceed with adding the code to my article.
How to Add HowTo Schema To WordPress
Now that I have my HowTo Schema code copied, it’s time to add it to my WordPress article.
Here is how I do it:
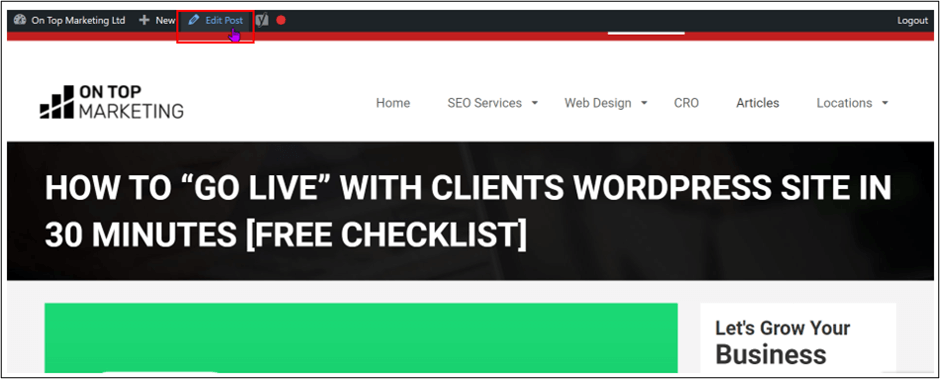
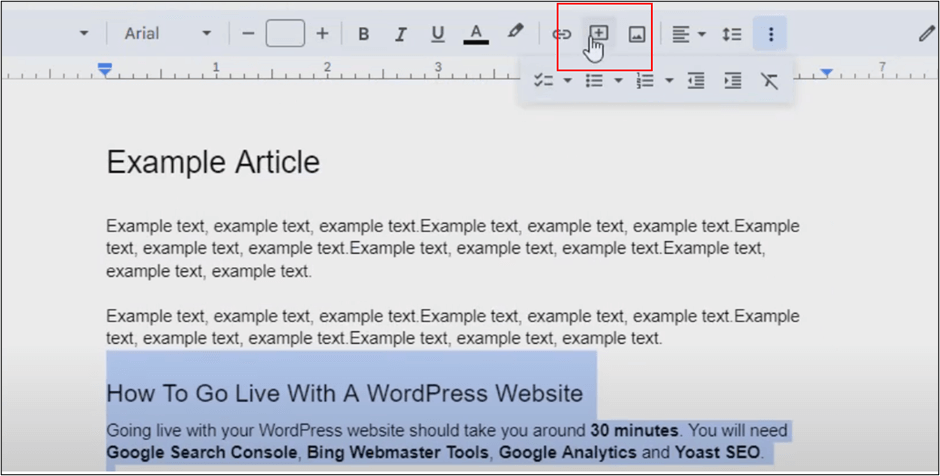
- Go to your article and click Edit Post.
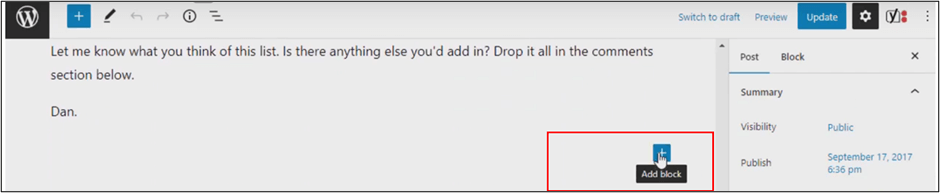
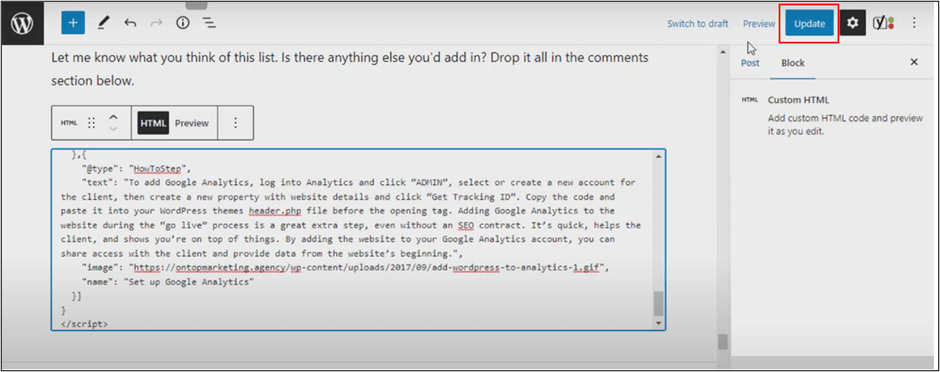
- Scroll through the very bottom of your article, then click on the plus sign to Add block.
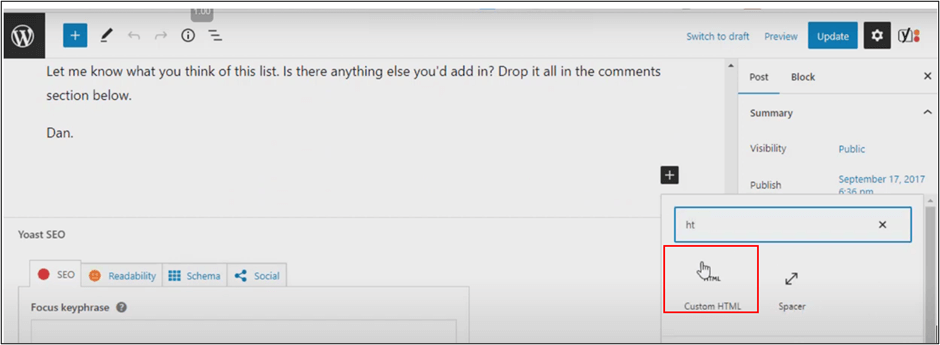
- Click on the Custom HTML block.
- Paste your code in the block.
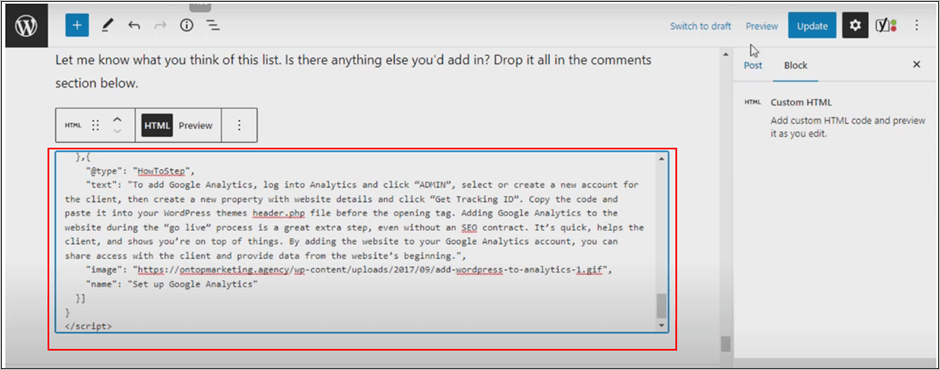
- Click Update.
Once you click on update, you’ll be redirected to your article again.
If you scroll right down to where you added the code, you’ll notice that you don’t actually see anything on the page at all.
No worries, it should appear exactly the same as it was before we added the HowTo schema. Look at this:
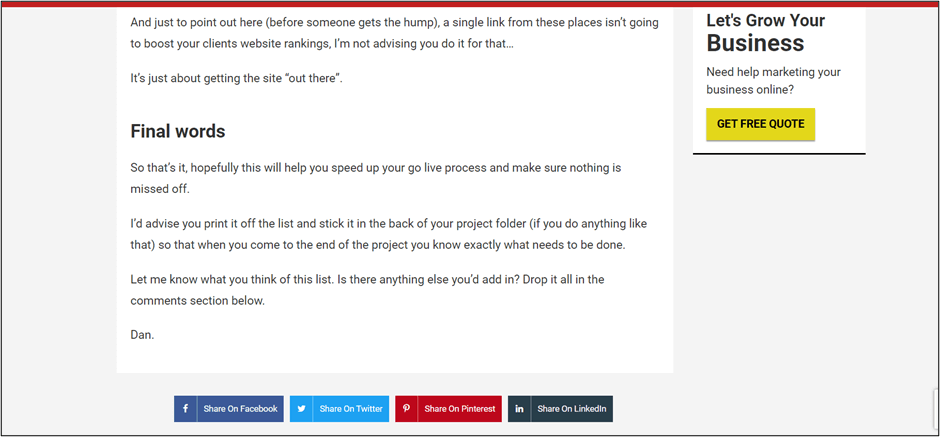
This is because the schema code we added is actually hidden and will not be visible on your blog posts.
NOTE: You should only include one how-to schema code on each page.
Testing HowTo Schema
Since it is not visible, you may be wondering if you were successful in adding the code to your web pages. In this case, you can always test your code once you’re done adding it.
There are actually a couple of ways to validate the HowTo schema code we generate and include in our articles. As always, I’ll share the quickest way to test HowToSchema using the validate feature of the site called Schema.org[2].
- Copy the URL of your article.

- Go to the validate feature in Schema.org and make sure that FETCH URL is selected, then paste the URL on the field.
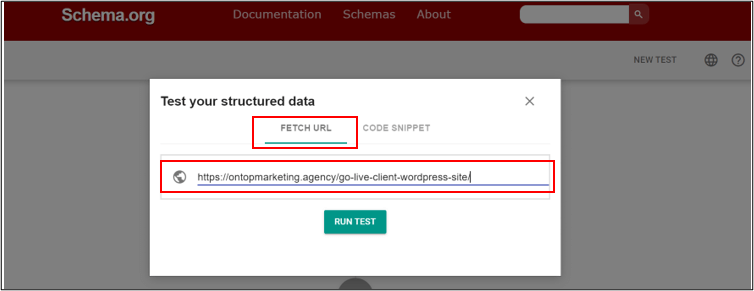
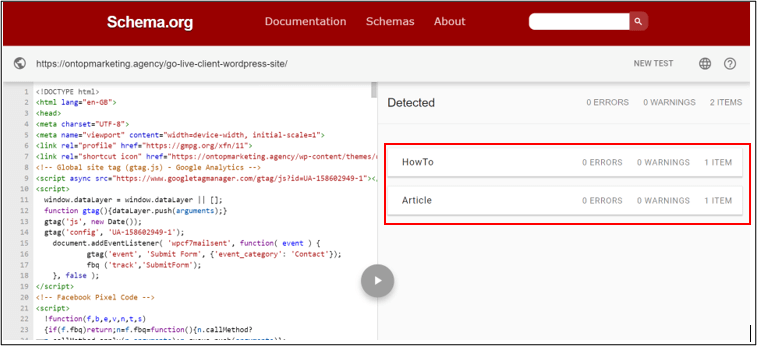
- Click Run Test.

- Once the results are displayed and the HowTo schema is showing no errors, this means that your code is correct and your article is good to go.
What happens if there are errors?
Is there a bunch of errors showing on the results page?
In cases like this, there’s no need to panic at all. The solution to resolve the errors is very easy to do.
All you need is to:
- Copy the schema code again.
- Edit your article and delete the custom HTML block that was added earlier.
- Recreate another custom HTML block, paste the code, and update.
- Run the URL through the test a second time.
Since the generator is very reliable, there is a good chance that the error is just due to the HTML block we used to paste the code in. Recreating the HTML block would likely solve the issue, which will result in the successful validation of your HowTo schema code.
Errors in Rich Results Test or Search Console
If you’re using the Rich Results Test or Search Console to validate your HowTo schema, you may notice that there are several issues showing when you try to check your URL.
Your Rich Results Test may look like this:
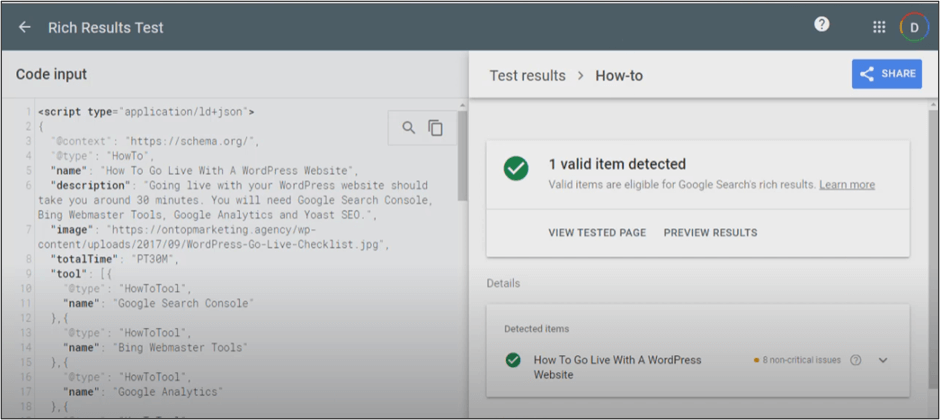
While the Search console may tell you this:
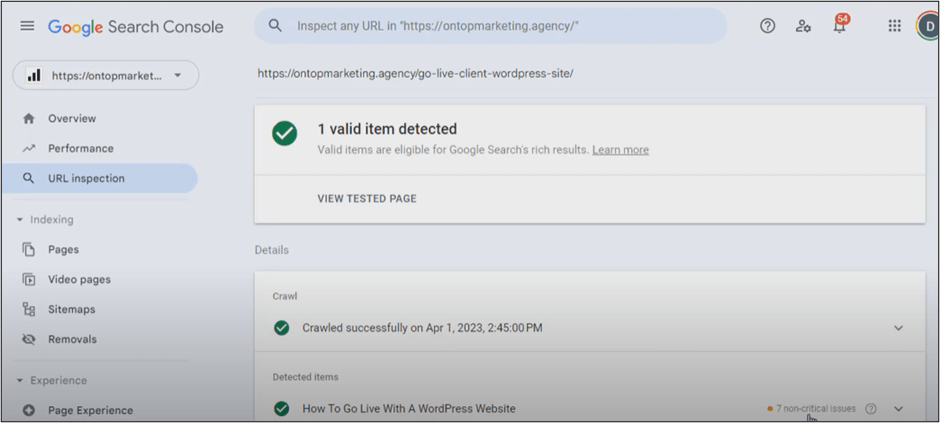
These are usually non-critical issues that will not really impact your pages negatively.
In fact, if you’ll have a look at the issues the sites are pulling up, you’ll notice that these things are optional for you to add.
Hence, you should not worry much about adding each and every piece of data to your code.

As mentioned earlier, if you lack various fields such as the estimated cost, currency, and even an image, that’s totally okay, as not all articles and tutorials you make will have those anyway.
How We Manage HowTo Schema (on our websites)
Now that you know how simple creating HowTo Schema is and how advantageous it can be to your websites, I wouldn’t blame you if you want to share and use it with your team ASAP.
If you have a writer and publisher and you want to include HowTo Schema in your processes, I’ll let you in on a simple strategy that worked for me.
Remember: Our content should be written well and structured in a seamless manner for us to use schema markup to its full potential. Hence, we’ll start by having our writers lay out their words in a structure that will make sense when we turn it into a How-To section.
Tips for Your Team
It will be great if your writers do the following:
Include relevant information or data
If you remember what types of information are being asked when we create the code in the generator, you’ll probably have an idea of what your writers need to include when writing your content.
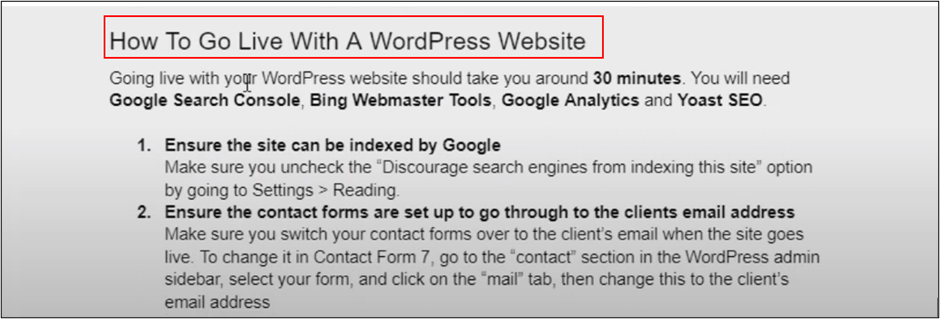
The most important thing when creating a How-To section is a Heading. The title should include what you are aiming to teach your readers in a concise manner so that they’ll be able to understand what they’ll get after reading the steps.
Next, there should be a Description of what you’re teaching that further explains the topic, which is usually a short paragraph or two.
In the description, your writer should include important data such as how long it’s going to take, if applicable. They are also going to include the different tools or supplies readers will need to do whatever it is you’re teaching them. If there are costs included, then they can also add the currency and total cost in this section.
Put important information in bold
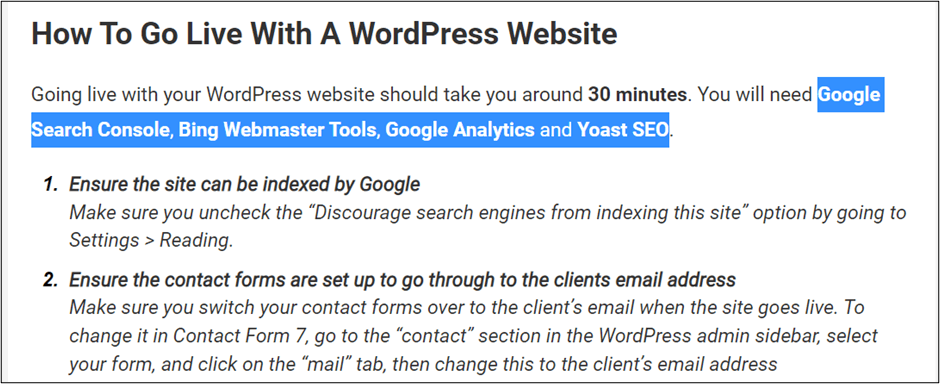
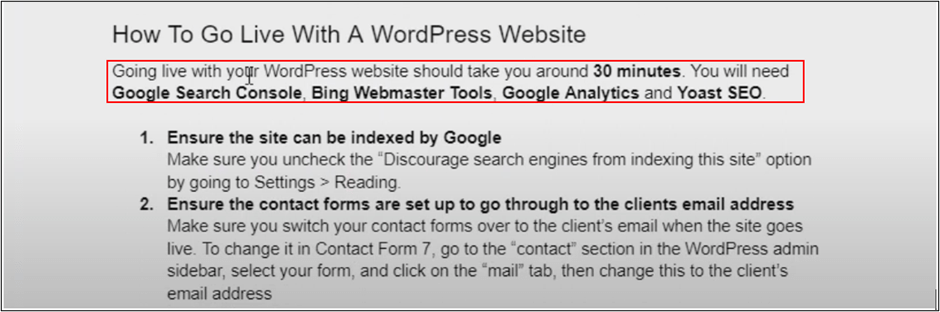
Check out this image:
Do you notice how I put the relevant info in the description in a bold format?
The duration and tools necessary for my How-To article are put in bold. This is so I’ll know which ones I’ll have to remember to put in the schema generator.
If your writer also makes use of this simple feature and puts relevant information in bold, it will be much easier for your publisher to go through the content.
As a result, they’ll be able to quickly pick out the information that they have to put in the different sections of the HowTo Schema generator tool.
Use proper structuring of the content
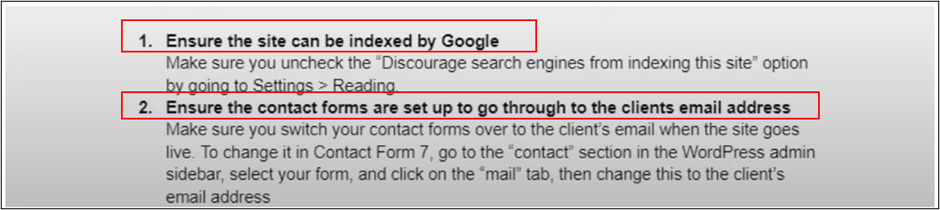
For the next step, it’ll be great for your writer to create an ordered list of each of the steps in an organized manner.
Each step will begin with a Title, formatted by a bold tag, followed by a line break. These headings must be blunt, straight to the point directions of what needs to be done. This way, the reader will be able to skim through each of these headings.
Under the title is the Description of each step which will be a more in-depth description of what needs to be done.
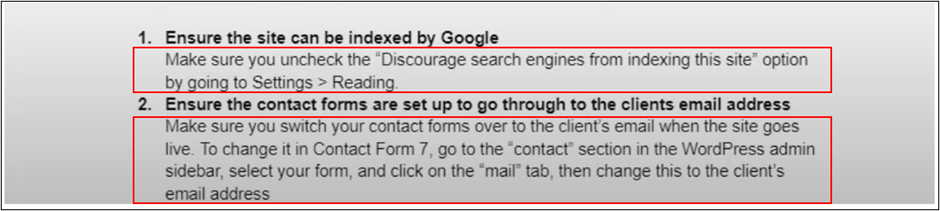
Highlight the relevant section by using the Comment option
Once your writer has finished writing the section, get them to highlight the whole thing. I’m using Google Docs in this example.

Click on Add Comment or use the Ctrl+Alt+M shortcut.
Then type in HowTo Schema and click the Comment button to post it.
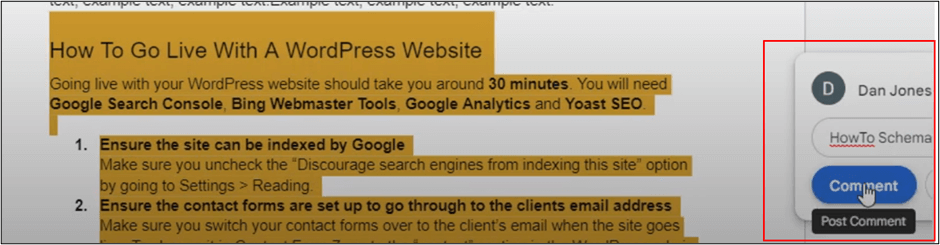
This is the result:
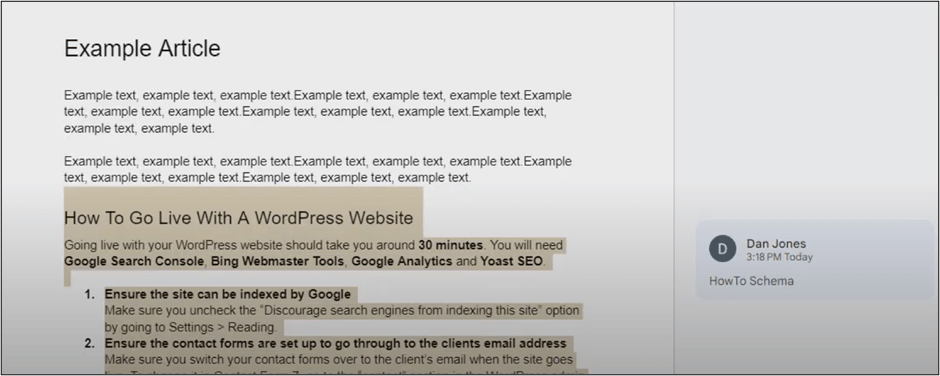
After it’s highlighted, you can now teach your publisher how to create the code. Since all the information is very visible and structured well, the process of generating the schema code and adding it to your pages will be more efficient.
What about publishing?
When the content is finished, it will be much easier for your publisher to make use of HowTo schema, provided that they already know how to do it. And if your writer is also your publisher, you can teach them how to generate and upload the code on your WordPress pages as well.
Of course, if you want them to learn quickly, sending them this article will surely do the trick.
Sharing this information with my team helped me avoid unnecessary communication and has made our daily process much more efficient for many years now.
BONUS CONTENT: A Glimpse of SERP Listings: Google vs. Bing
Did you know that various search engines display their SERPs a bit differently?
For example, let’s have a look at the wikiHow listing for the phrase “How to tie a Windsor knot” using the search engine, Google:

Here is the same listing on Bing:
Do you see how the layout for the SERP listing in Bing is so much bigger than Google’s?
There is also an option to click through each of the steps being displayed for a preview, without having to go into the actual website.
Can you imagine how a listing as visible as this can positively affect your page’s traffic?
Although the way search engines display their listings can easily change, it’s interesting to see how Google and Bing handle their schema markup differently.
Do you have questions?
Implementing HowTo Schema on your pages offers lots of benefits for your SERP listings.
What do you think will happen if your listing is more attractive and visible?
That’s right, you’ll have more information to give to potential visitors. This will result in higher click-through rates (CTR) and of course, will generate more traffic to your website.
After all, it is less likely for searchers to click on a SERP listing that only displays a few words about how a blog post will be helpful for them. When they’ll see a bigger listing that contains more info about what they are looking for, it is normal for them to click on the article and read your actual content.
If you have more questions about using schema markup and how to teach it to your team, feel free to leave a comment below.
SEE ALSO: 9 Tips To Get More Traffic To Your Blogs
Frequently Asked Questions
Schemas are basically a set of languages that will allow various search engines to understand your content.
Schema.org is one of the tools me and my team use to validate HowTo Schema on our pages. However, there are lots of schema validators aside from this that you can find on the internet.
Schema errors are problems you may encounter when there’s an issue with your code’s structure. The usual causes of errors are invalid characters, extra spaces, or an issue with the custom HTML block in WordPress.
A plugin can make it easier to add schema markup to your WordPress pages. However, it is not required as you can quickly add one using the Block Editor.
Absolutely. Aside from Google, Bing also understands schema. If you want to optimize your listing in Bing, adding schema markup to your pages will be beneficial.